I decided to take a business and blogging hiatus while training myself for motherhood. And while attempting to get some sleep. Now that I have motherhood nailed (LOL), I'm sleeping at night and 7 pounds from my pre-Cruz body (thank you semi-healthy food & P90X) ... BACK TO IT!
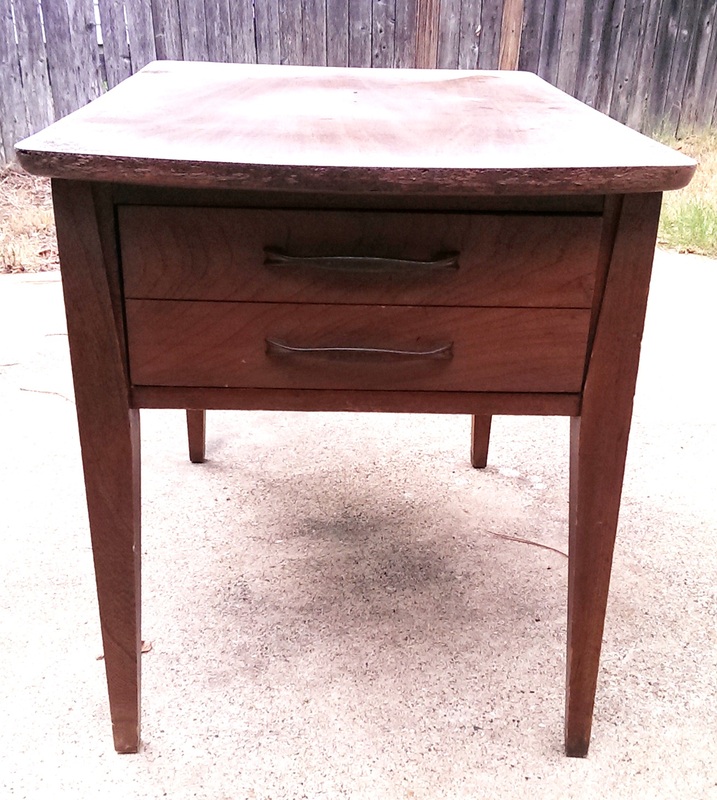
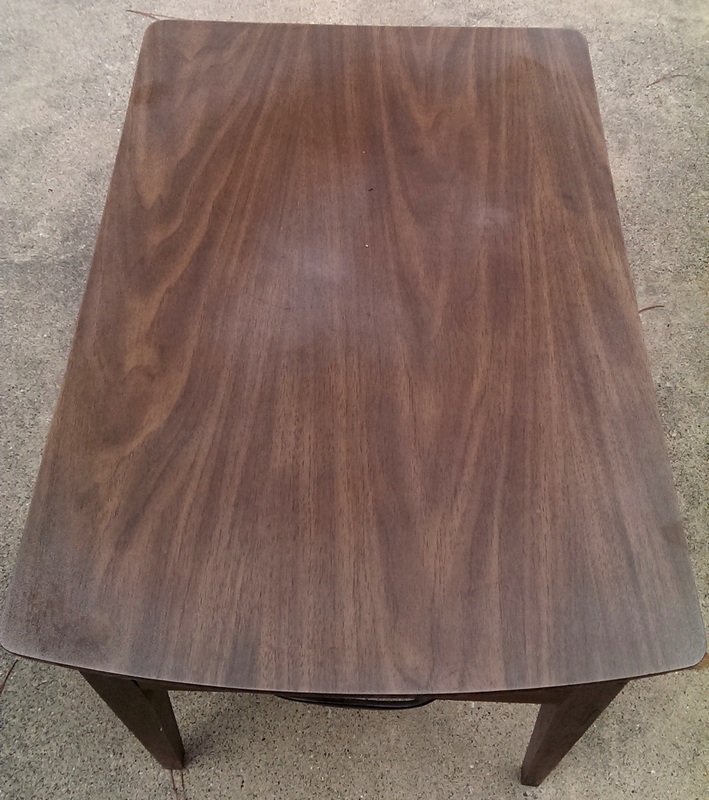
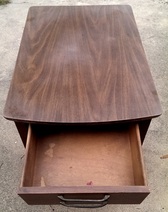
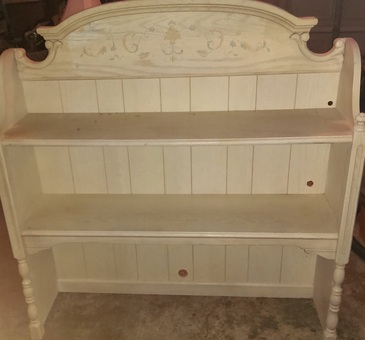
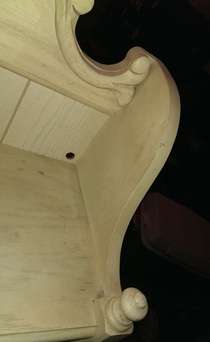
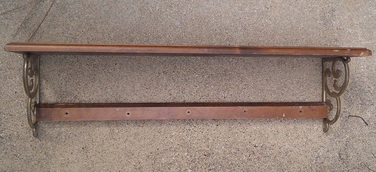
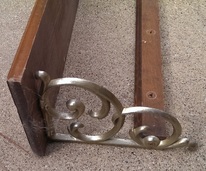
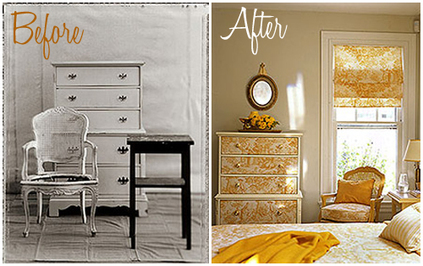
Here are a few projects that are currently in the works... These beautiful antique end tables need some help! I found inspiration on Pinterest that I'm planning to try here. These will be for sale very soon! This hutch has some fabulous details but the etching at the top and the color, not so fab. I still need to find a chest or dresser to add to this and when I do, watch out! This item will be listed for sale VERY SOON! ... if anyone has interest in customizing this piece, I will take your ideas and sell it to you customized. Email me here. This lovely shelf came equipped with spider webs and rusty screws. Let's glam it up a bit, shall we? Unfortunately this shelf won't be for sale because it belongs to my awesome sister Rhonda. But I'm scouring Craigslist and garage sales for finds like this to restore and sell! Here's to getting BACK TO IT!! ~Amy
Started the 2-Day cleanse on Monday and it was MUCH harder than I thought. We ate 3 meals a day with a snack but I say 'meals' really loosely. Here is the breakdown below. And before you judge me for being way too negative, wait to finish reading my ENTIRE review...
BREAKFAST: Quinoa with prunes - OK I know a lot of people adore quinoa, it is healthy and packed with good stuff. I loathe it. I didn't realize how much until I did this. Although the prunes definitely helped to mix it up a little. Let's just say I got through it. LUNCH: Blueberry and Banana Almond Milk Smoothie - This was actually really good so I looked forward to having a tasty smoothie after the quinoa... and please excuse the HORRIBLE selfie. DINNER: Vegetable Soup with a side of Sauerkraut, Apple for dessert. I didn't even take a picture of this because I was too busy concentrating on actually eating it. The veggies consisted of onions, which I don't like, mushrooms, which I don't like, and celery, which is my favorite of the 3! I think I need a lesson in loving veggies because yowza this was really hard to do for 2 days.
DINNER, Day 2: I ended up nauseous on Night 1 so decided to substitute for Organic Veggie Lentil Soup instead. Still healthy but not as tough for me to swallow.
SNACK: Kale-Pineapple-Artichoke-Cucumber Juice - This juice was the daily 'snack' which tasted like eating lettuce. That being said, it actually was tolerable and helped in-between glasses of water throughout the day. Here's my hubby enjoying his green juice... OVERALL REVIEW: Whew this cleanse was tough! I bitched and moaned HOWEVER I came out of it with a renewed sense of eating healthy. I even got in a workout while cleansing and worked out again today. Maybe I'm finally onto something here...
Having a baby boy has been such a blessing minus one big thing - what the heck happened to my body?! I ask myself this question every day and think back to when I was happily eating chocolate ice cream a few months ago... BUT I told myself that when I was pregnant I was going to enjoy it and eat ice cream because I knew after I had the baby it was back to business! Putting it all out there, I gained a total of 50 lbs when I was pregnant. That's right! Take into consideration that I was severely bloated with pre-eclampsia so after giving birth, the first 30+ lbs came off really quickly. So quickly that I assumed I wouldn't have to work for the rest. But after 8 weeks I have now realized that I do. And I have to work hard.
DIASTASIS RECTI - Any woman out there that reads this and doesn't know what it is, I beg you to watch this video to see if you have it - this has helped me to start healing my body properly- If you DO have Diastasis Recti, you can YouTube exercises to reverse it. Although I have started my Diastasis exercises, it's been hard for me to get back into a REAL non-preggo exercise routine. SO with that being said, Jaime and I have decided to start a cleanse. We chose Dr. Oz's 2-day Wonder Cleanse and will be starting tomorrow... A 2-day cleanse is all I can handle at this point. I thought blogging about our little journey would help with the mental side of this cleanse. Wish us luck!
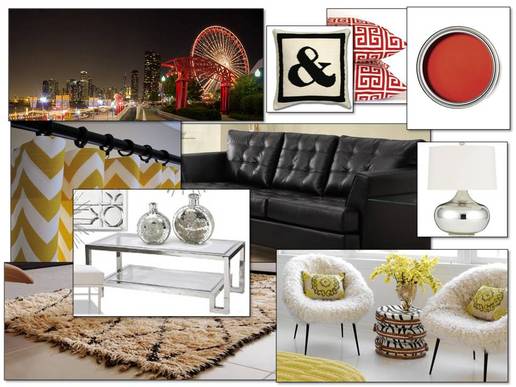
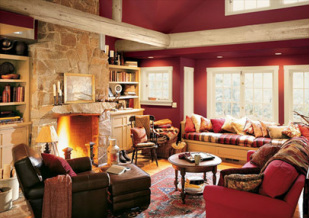
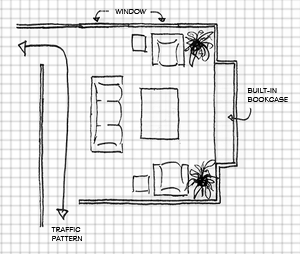
Decorating, even redecorating a room can be overwhelming! What colors inspire you, what type of style, where do you even begin?! I know we've all had this problem at one point or another and I have been reading up on tips for getting started decorating a room that I just HAD to share. One of my favorite things before Pinterest was cutting ideas out of magazines and creating inspiration books. Who am I kidding, I still do that... INSPIRATION BOARDS: Here is an inspiration board that I created for a fun example. I added this Chicago Navy Pier artwork for Jaime, he loves cityscapes. STYLE & THEME: Determine your room’s style and maybe a theme for the room. This doesn’t have to be as concrete as contemporary or shabby chic, I think it will just define the type of pieces that you will be looking for. For instance, are you looking to work with clean lines, silver accent pieces? Or maybe rustic woods: You may even have a main piece to center your style around. In my Inspiration Board, I started with the black couch which I have in my living room. This couch has very clean lines so I want to work off of that style.
DEFINING COLOR: From here you can choose the defining color of the room. I chose red and yellow accents, inspired by this red habaňero paint color. You can go bold with a RED couch or maybe paint your existing coffee table red. Or you can go tame, as I have, with red accent pieces or an accent wall. The fun thing about this part of the project is that maybe you have red pillows on your bed, you can transfer them to the living room for a fresh new look without spending extra dough.
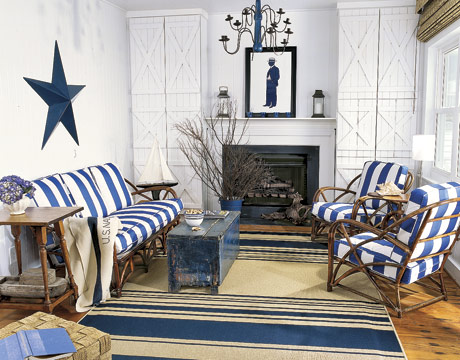
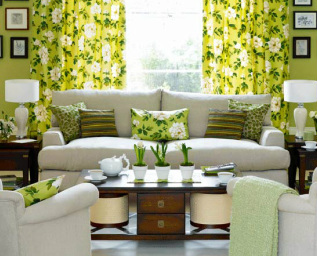
You may even have a color palette in mind such as Spring colors, Neutrals, Ocean theme: LIST ROOM COMPONENTS: At this point you have a style that you’d like to work off of and the color inspiration for your new room. Before creating an inspiration board, list all of the components that you plan to make up this room. For the living room you will need a couch, coffee table, rug, chairs, maybe an entertainment piece, lamps, end table, curtains, art. You may need to do some measuring to see what will fit into your room. Also count the number of walls in this room to determine how much art you will need, how many curtains. PURCHASING NEW DÉCOR: First, determine from the colors and style that you have chosen, can you utilize any items that you already have in your home? If you are buying new décor, narrow down what you will need. For example, this black couch will need a more contemporary coffee table/accent tables. An antique Victorian oval table will NOT cut it. I also know that since my living room is narrow, a round or square coffee table will take up too much room, so I have easily narrowed down the type of table that I would need to purchase. And Craigslist is an EXCELLENT place, or the local thrift, for those DIY-ers like myself! When you start to shop for any new décor, be sure to have a list with you at all times so that you stick with EXACTLY what you’re looking for in this room and don’t go overboard with items that you really don’t need. I LOVE the variety of décor carried at TJ Maxx and Home Goods stores. They are very affordable and carry such a wide array of styles. Or you can make your own inspired pieces! | Horchow Recycled Glass Lamp $325 | Thrifty Abode DIY Lamp $18 | CREATE YOUR BOARD: This is the most fun part for me. I wouldn’t focus on finding photos for your board based on price tags – you can ALWAYS find something more affordable with a similar look. If you can’t decide between a couple of different styles, choose photos from both. Once you start putting everything together, you will see what gels and what sticks out like a sore thumb.
I hope I've helped to inspire a little weekend creativity… I would love to see YOUR Inspiration Boards!
~A
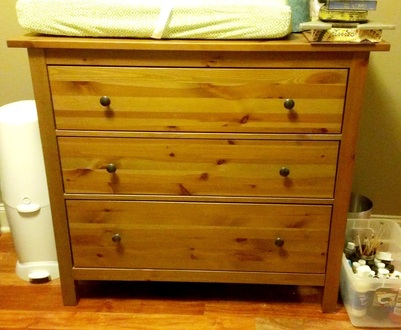
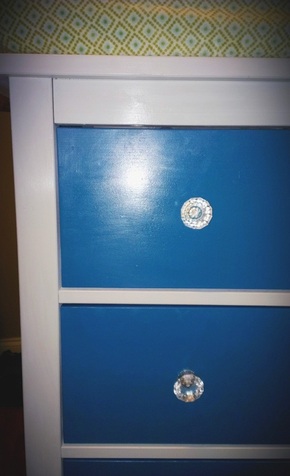
If you remember from a few posts back, we own a past-life bachelor pad dresser that is pretty hideous to look at, courtesy of my hubby:
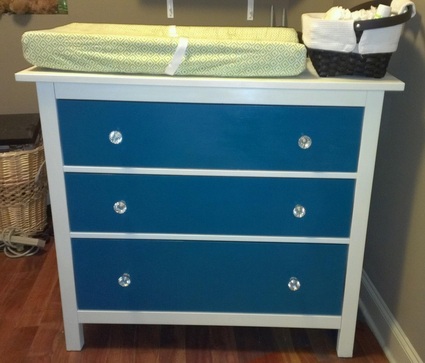
But voila! Add a little primer, a little paint, a great wax job and we have ourselves a beautiful and almost free baby dresser:
Now for a breakdown of the products used to produce this new beauty -
1. KILZ ODORLESS PRIMER - We started with the idea that spray paint is easier. We spray primed the drawers with Kilz Odorless Primer. Although this spray may be odorless, it still STINGS the nostrils! This primer was all over the floor, the walls, everywhere you could think of. Not ideal for in-home priming. Live and learn.
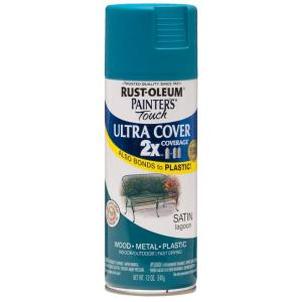
2. RUST-OLEUM PAINTER'S TOUCH ULTRA COVER - We first sprayed the drawers with Rust-Oleum Painter's Touch Ultra Cover in Satin Lagoon. Great coverage, no complaints there. My only complaint was, again, painting inside our home with sprays. Just not a good idea if you live in a semi-small apartment. Moving on to brush paint.
3. BEHR PREMIUM PLUS ULTRA PAINT + PRIMER SEMI-GLOSS - I fell in love with this paint! This is what we decided to switch to for completing the body of the dresser after the spray painting debacle. This was color matched beautifully with the crib, Heirloom White. It is a bit more costly but worth the money with built-in primer. I was also leery of the semi-gloss look when we used satin spray paint (only because I couldn't find the spray in semi-gloss) but with a good wax job, it all blended together in the end.
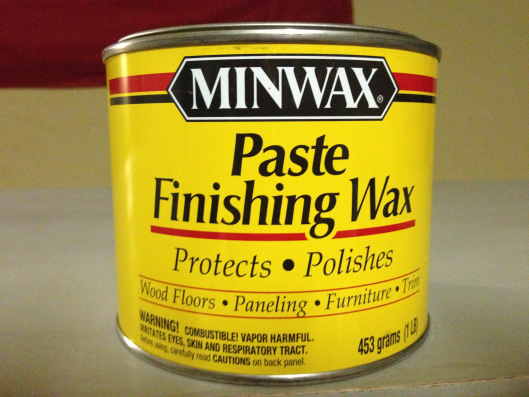
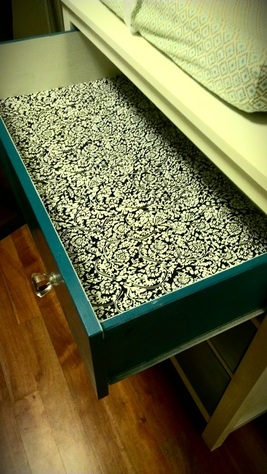
4. MINWAX PASTE FINISHING WAX - This stuff is inexpensive and works so much more beautifully than Polyacrylic or Polyurethane without the sticky feeling that they tend to leave on furniture. In my professional opinion, at least. We worked this into the finished wood with an old tshirt, much better than using a paint or foam brush. Tried those first, of course. After 3 minutes, we wiped off the excess wax and the piece was left looking shiny and polished but most importantly, left a very natural look to the painted wood. Apparently I can't say enough about this wax. See detail below... | Look at that shine! | Drawer liners to top it all off | 5. DRAWER LINERS - I found this particular liner at Target. These were a bit harder to add than I originally thought. I tried the directions on the liners themselves, not successful. Then tried a couple of different methods before one finally worked the best for me which was cutting the liner in half, adding to 1 side of the drawer, then fitting the other like a puzzle piece to the opposite side of the drawer. Definitely need to play with drawer lining a bit more before I become a pro... But I had fun and the final piece looks great so that's a success in my book!
~A
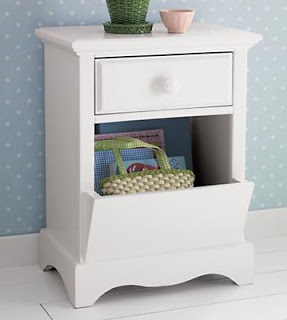
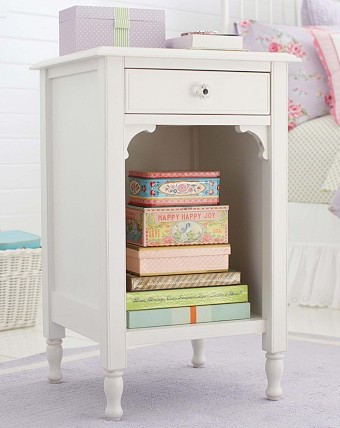
Since the husband was out of town this weekend I thought it would be a perfect time to find a great nightstand for the baby's room. Jaime isn't very patient when it comes to what I like to call my 'discovery process'. By this I mean discovering an old ugly piece that has potential for greatness. He can't exactly see the GREAT in something that isn't so great to begin with. This was what I had in mind, thinking "how hard could this be??" -
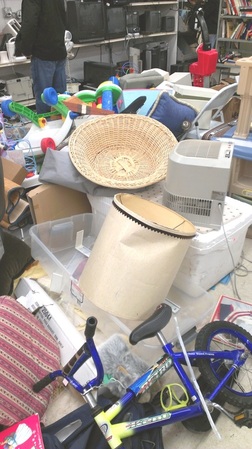
Oh it was MUCH harder than I ever thought. Here is what I ended up finding in several of the areas marked 'Furniture section' of my local Chicago thrift stores -
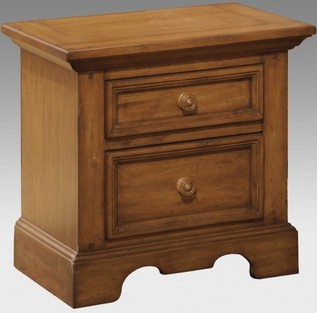
Shame on you, 'Furniture Section'! You've got to be kidding me Chicago. I remember a thrift store in Irving, Texas with the most amazing refurbish-worthy furniture... maybe I need to get to the 'burbs. I did find ONE solid wood nightstand that was in decent shape for $30 - but I thought, I can beat this:
... I should have gone back for that one. I am now determined to find the perfect piece. More on that soon, I hope!
~A
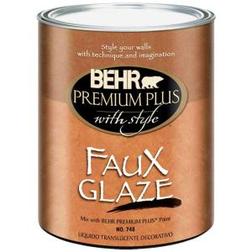
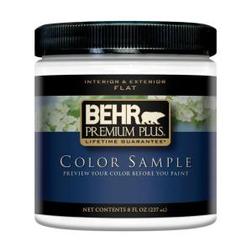
I feel that I have tons of unfinished projects around the house these days that I can't wait to finish and post to the blog. Luckily I finally finished a couple of things this weekend and it feels SO good! Remember this is where I started on my nursery wall plaque project, very shabby chic: And here is the plaque after paint when I determined that a little glaze might go a long way.. very uneventful with just a coat of paint since there is so much detail in this piece: And the finish product, coloring is a little off due to my camera phone photography, but you see how the glazing MADE these pieces stand out: Here is the glaze mixture that I used to achieve the look:  1. To achieve desired glaze effect, mix 4 parts Behr Premium Plus Faux Glaze with 1 part Behr Premium Plus Color Sample in Black. A sample of black is all you need since you are only mixing 1 part to 4.
2. Brush the mixture onto your piece ensuring that you completely cover the detailed areas. You can immediately wipe the excess glaze from the piece with a cloth or even a paper towel. Stop there or continue to paint on glaze and wipe away until you reach a desired textured look. The glaze job doesn't have to be perfect, you can leave extra here and there, wipe away too much somewhere else - it all adds character to your piece in the end!
I think these pieces turned out great after 10 years of moving them with me from Fort Worth to Dallas, TX to Chicago, IL... I'm now happy that I kept them around!
~A
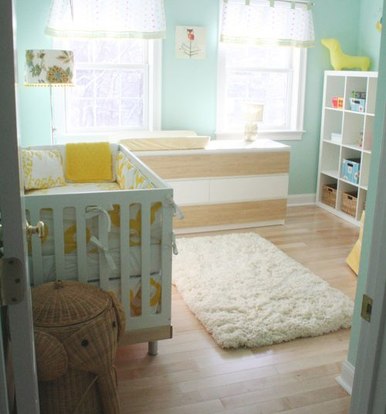
When I think about blue and pink nurseries, something makes my stomach turn. Not that there is ANYTHING wrong with a stereotypical color for a girl or boy's nursery but for me, I'm more a fan of the neutral colors that can go either way such as aqua, yellow, orange. Here are some of my favorite neutral nursery looks: I love how this room flows so nicely with little *pops* of color! The orange pieces really stand out here! Makes me want to add this cute little Etsy sign to this room... A simple neutral shelf draws your eye in this yellow and light aqua nursery...
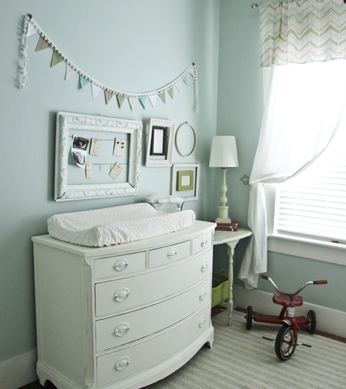
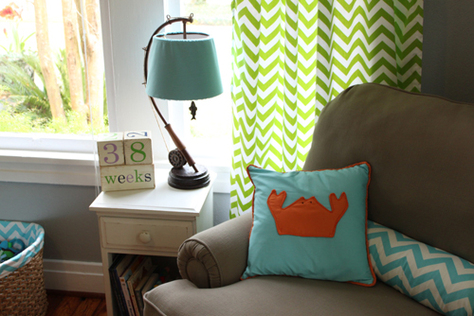
The yellow and light aqua color mesh so well together in this room. Is it a girl or boy's room? Who cares because it is so sweet. And the rug adds such an elegant touch.. I want that rug! I found a similar one at Ikea with a little more flavor... This rug sells for $9.99 at Ikea and is faux sheep skin. So I get the feel of soft animal fur without feeling guilty that a sweet little sheep was skinned for my benefit! The gentle colors in this room are SO sweet but I especially love the celebration banner hung above the frames. I also like the neutral look of a burlap banner like this one from Etsy... The small personal touches in this room attracted me to this photo.. dual green chevron pillow, basket and curtain, the little table with baby books and fishing lamp coordinating with the crab pillow. Love how it is subtle but so personal!
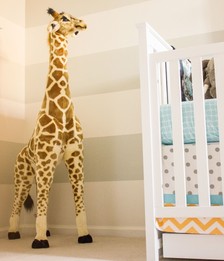
And finally, I'm obsessed with the giant giraffe and want one so badly! Don't ask me why but I think it's too cute peeking over the crib. Maybe a little creepy but mostly cute. I'm somehow doubting that Jaime will agree with me - what do you think about this big guy? I found one by Melissa & Doug at ABaby for $69, not too shabby since a less realistic looking giraffe at Toys R Us sells for $149.99! What can I say, I love bargain hunting! Half the fun of shopping, in my opinion. ~A
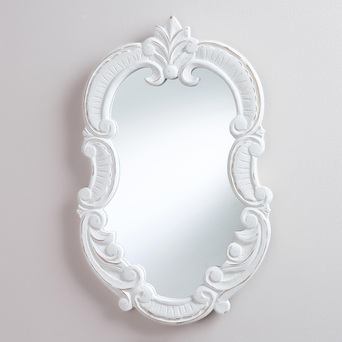
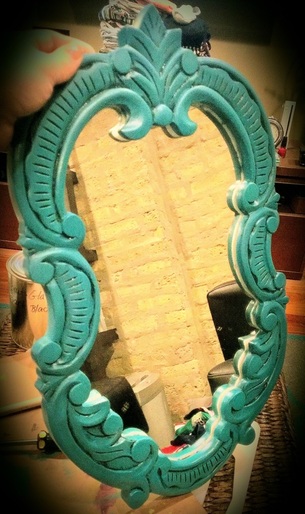
Happy St. Paddy's Friday out there! So I've said before that I just have a problem buying something and utilizing it "as is" - am I the only one with this problem? Take this mirror for example. I really wanted a fairy tale-esque mirror for the baby's room and found the PERFECT one at World Market for 30% off! There was nothing wrong with the mirror. It was just white and lacked the character that I was looking for in my home. You will come to realize that I like bright colors and if I didn't have a husband with a bit more conservative taste, I would probably have alot more kooky things in my house. Here's the mirror before: And here is the mirror after a nice paint job with some glazed finishing touches. I haven't used glaze too much before so I was really excited to see how it would go over on this beautiful mirror. Mission accomplished! (Forgive the mess in the reflection) I think the hardest thing about this revamp project was taping the mirror. I decided not to show a picture of that because it wasn't pretty. But it was necessary for an easy repaint job. I have this vision of picking my baby boy up from his crib and looking in the mirror to see myself being a mommy. Corny, huh? Well, I can't wait to do that with this piece! ~A ** Check out my project feature on Liz Marie's Linky Party!
So we started our spray paint job on the man chest this weekend. Wow, was that a PROJECT! I think we both realized that spray painting might not be the best idea for the size of our home. Thus, this is the first and last undertaking of this kind while in our current condo. I will have to find some good painting brushes for future projects. Due to the fume headache, I didn't take any progress pics but will do so tonight for tomorrow's post. I really had to apologize to our baby boy for that mishap.
Since I wasn't actually allowed to help with the spray painting makeover, I was only allowed to take in fumes from under the door, I decided to take on a small hand painting project of my own. Just so that you're aware, I'm the type of person who doesn't like to buy new things for my home if I already own something I can re-do. For example, there is a small skinny wall space in the nursery that's in need of love... I could buy a new cute baby decor item but what fun is that?! Instead I'm attempting to revive these wall plaques that I haven't utilized because they don't really fit our style any longer: At one time I painted a little light green in the center and called them good but they now need a drastic makeover to fit our more contemporary style, versus my old love for country chic. Here is a start to the new look.. trying out a little glaze on these bad boys once they have a final paint job and really hope they add a fun touch to the skinny bare nursery wall: Aren't mini projects fun on a rainy Sunday?
~A
|


 RSS Feed
